Oct 10, 2026Ultrasonic Cleaning Technology
Why Is My Ultrasonic Cleaner Not Cleaning Properly? A Troubleshooting Guide for Parts Cleaning
Troubleshoot why an ultrasonic cleaner is not cleaning properly, including cleaning solution, degassing, bath condition, temperature, loading, cavitation, filtration, rinsing, and equipment setup.

An ultrasonic cleaner may make sound, heat the liquid, and run through the cycle, but the parts still come out dirty.
When this happens, many users assume the machine is defective. Sometimes that is true, but in many cases poor cleaning is caused by the process around the machine: the wrong cleaning solution, exhausted bath, poor loading, unsuitable temperature, insufficient time, trapped air in the bath, blocked cavitation, or a tank that is too small for the workload.
Ultrasonic cleaning is not magic. It is a balanced process that depends on three forces working together:
- mechanical action from cavitation
- thermal support from heat
- chemical action from the cleaning solution
If the temperature is too low, the chemistry may not work effectively. If the chemistry is wrong, cavitation alone may not remove oil, grease, carbon, flux, or polishing compound. If cavitation cannot reach the dirty surface, even the right detergent may clean unevenly.
This guide explains how to troubleshoot poor ultrasonic cleaning results before assuming the cleaner itself has failed.
Quick Answer
If an ultrasonic cleaner is not cleaning properly, start by checking the process variables before blaming the machine.
The most common causes include:
- the cleaning solution does not match the contamination
- the bath is too dirty or exhausted
- fresh solution has not been degassed
- temperature or cleaning time is incorrect
- parts are overloaded or stacked incorrectly
- ultrasonic shadowing blocks cavitation from reaching some surfaces
- blind holes, deep grooves, or internal channels are not exposed properly
- the tank is too small or underpowered for the load
- frequency is not suitable for the cleaning task
- filtration, rinsing, or drying is missing
- cavitation is weak, uneven, or not working correctly
A good troubleshooting process should move from simple checks to deeper equipment evaluation.
Start with the Cleaning Problem, Not the Machine
Before changing settings or replacing equipment, define the cleaning problem clearly.
Ask:
- What material are the parts made from?
- What contamination needs to be removed?
- Is the contamination oil, grease, carbon, polishing compound, flux, dust, chips, or scale?
- Is the contamination fresh, dried, baked-on, or trapped inside holes?
- Which areas remain dirty after cleaning?
- Are the parts dirty everywhere, or only in certain blind holes, grooves, threads, or contact areas?
- What result is required after cleaning?
This matters because different cleaning failures have different causes.
If the entire part remains oily, the cleaning chemistry or bath condition may be wrong.
If only blind holes or internal channels remain dirty, the issue may be loading, orientation, frequency, or part geometry.
If parts look clean but have white residue, the issue may be rinsing, water quality, detergent concentration, or drying.
If parts rust after cleaning, the problem may be water handling, drying speed, or lack of corrosion protection.
Do not treat every poor cleaning result as the same problem.
1. The Cleaning Solution May Not Match the Contamination
Ultrasonic cavitation helps loosen contamination, but the cleaning liquid must also chemically interact with the soil.
If the detergent does not match the contamination, the machine may run normally but still clean poorly.
For example:
- light oil may need a different detergent than heavy grease
- carbon deposits may need a stronger or more specific cleaning approach
- polishing compound may require good wetting and emulsification
- flux residues may require chemistry compatible with electronics cleaning
- aluminum parts need material-compatible chemistry
- sensitive metals or coated parts may require gentler solutions
Using plain water is often not enough for industrial parts cleaning.
Using the wrong detergent can also cause new problems, such as residue, staining, corrosion, or poor rinsing.
A stronger cleaner is not always better. Overly aggressive or incompatible chemistry may damage sensitive materials, finishes, or coatings.
When troubleshooting poor cleaning, first confirm whether the cleaning solution is designed for:
- the part material
- the contamination type
- the required cleanliness level
- the operating temperature
- the ultrasonic cleaning process
2. The Bath Is Exhausted: Why Extending Cycle Time May Not Work
Even with the right detergent, the bath will eventually become loaded with oil, particles, sludge, chips, and dissolved contamination.
When the bath is exhausted, cleaning performance drops.
Signs of an exhausted bath may include:
- parts come out with an oily film
- dirt redeposits on the surface
- cleaning takes much longer than before
- the liquid is dark, cloudy, or visibly contaminated
- oil floats on the surface
- particles settle at the bottom of the tank
- the same process worked before but no longer works well
In this situation, increasing time or temperature may not solve the problem.
The bath may need replacement, oil separation, filtration, or a better cleaning process.
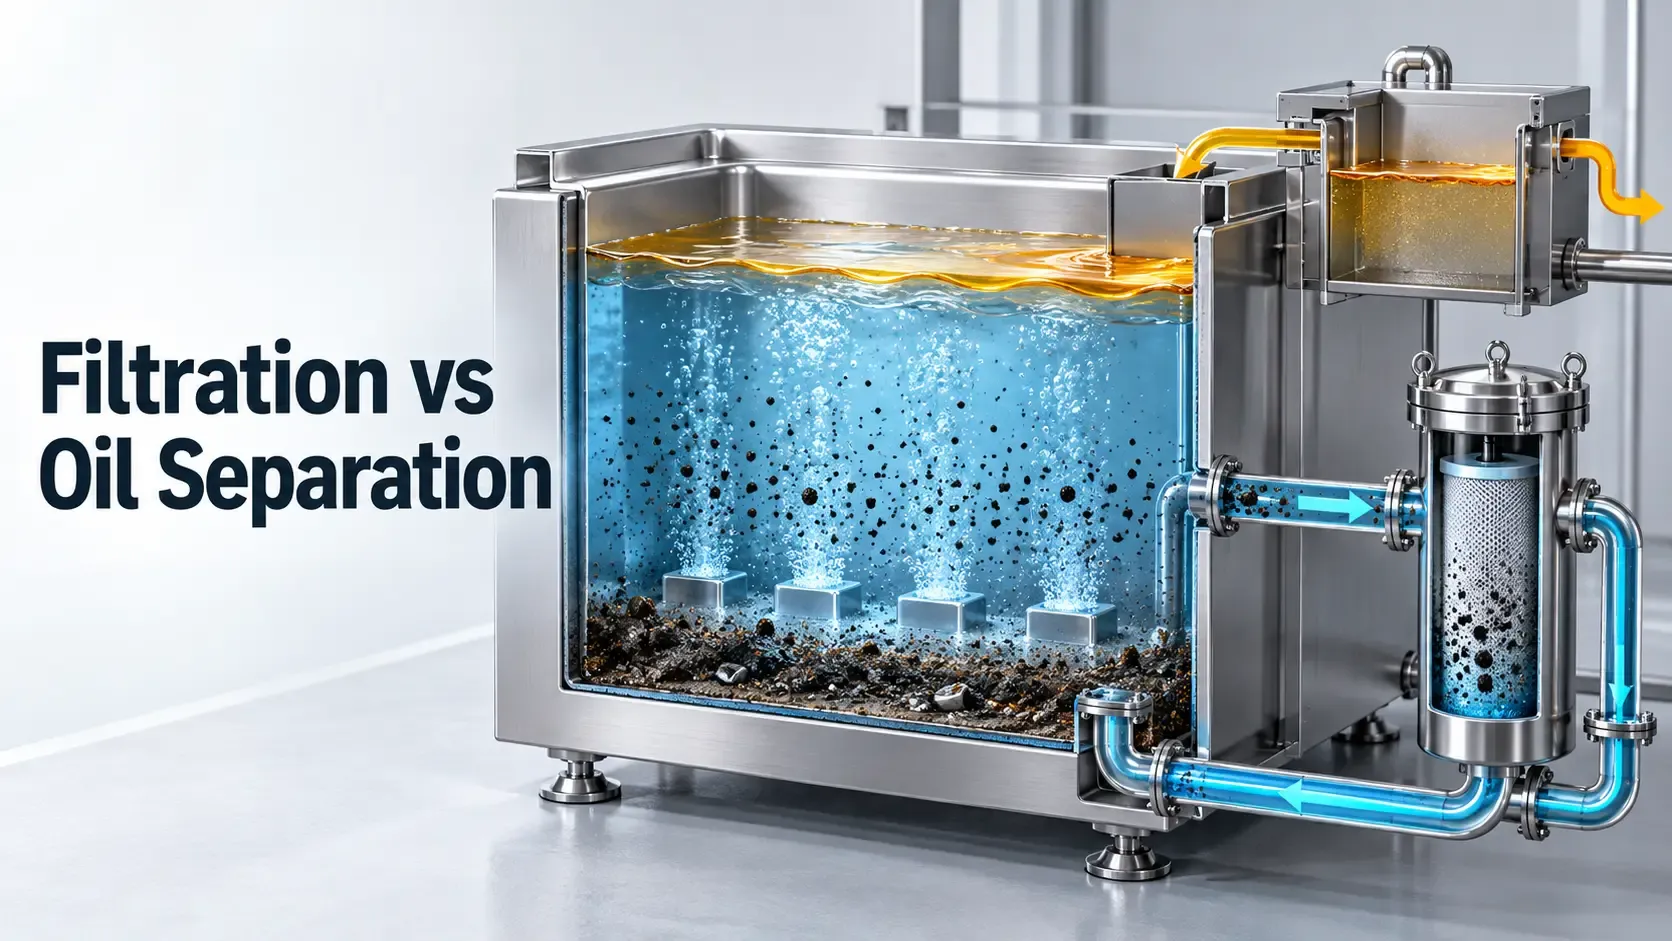
For repeated cleaning of oily parts, filtration can help extend bath life and reduce redeposition. However, filtration does not replace the need for correct chemistry, proper rinsing, or periodic bath replacement.
3. Fresh Solution May Need Degassing
If you have just changed the cleaning solution and the machine suddenly seems weaker than expected, the bath may need degassing.
Fresh water or freshly mixed cleaning solution can contain dissolved air. This trapped gas can absorb ultrasonic energy and reduce effective cavitation during the first part of operation.
A practical starting step is to run the ultrasonic cleaner with the solution in the tank before adding parts, allowing trapped air to escape. Some machines have a degas function; others can be run without parts for a short period before cleaning.
Always follow the equipment and chemistry supplier’s instructions. The required degassing time depends on tank size, liquid volume, solution type, temperature, and machine design.
Degassing will not fix every cleaning problem, but it is an important basic check when poor cleaning happens right after a fresh bath change.
4. Temperature or Cleaning Time May Be Incorrect
Temperature and time have a major effect on ultrasonic cleaning performance.
If the liquid is too cold, oil and grease may remain viscous, and the detergent may not work effectively.
If the liquid is too hot, some detergents may lose effectiveness, some materials may become more sensitive, and cavitation behavior may change.
Cleaning time also matters.
If the cycle is too short, contamination may not fully loosen.
If the cycle is too long, it may waste time, heat the parts unnecessarily, or increase risk for sensitive materials.
There is no universal temperature and time setting for every part.
The right setting depends on:
- part material
- contamination type
- detergent chemistry
- part geometry
- required cleanliness
- load size
- whether rinsing and drying are included
For engine parts, a useful starting reference is covered in Optimal Temperature & Time Settings for Ultrasonic Engine Parts Cleaning. For other parts, temperature and time should be tested according to the material, contamination, and cleaning chemistry.
5. The Loading Trap: Beware of Ultrasonic Shadowing
Loading has a direct effect on ultrasonic cleaning.
If parts are stacked, crowded, or placed in a way that blocks liquid movement, cavitation cannot reach all surfaces evenly. This can create ultrasonic shadowing, where one part blocks another area from receiving effective cleaning action.
Common loading problems include:
- too many parts in one basket
- parts touching each other tightly
- parts lying flat against the tank bottom
- deep holes facing the wrong direction
- trapped air inside cavities
- heavy parts blocking smaller parts
- baskets or fixtures reducing ultrasonic exposure
Parts should not rest directly on the tank bottom unless the machine is specifically designed for that load method. Direct contact can reduce cleaning performance and may damage the tank or parts.
For better cleaning, parts should usually be placed so that liquid can flow around them and trapped air can escape.
If a part has holes, grooves, or internal channels, the orientation should allow the cleaning liquid and cavitation activity to reach those areas.
When cleaning results are uneven, reduce the load and test again. If fewer parts clean better, the issue may be overloading or poor fixture design rather than machine failure.
6. Part Geometry May Be Blocking Cavitation
Some parts are difficult to clean because of their shape.
Blind holes, deep grooves, threaded holes, internal passages, narrow slots, and overlapping surfaces may not receive the same cavitation energy as open surfaces.
This does not mean ultrasonic cleaning cannot work. It means the process may need adjustment.
Possible improvements include:
- changing part orientation
- reducing batch size
- using a different basket or fixture
- increasing cleaning time carefully
- selecting a more suitable frequency
- adding pre-cleaning for heavy contamination
- using rinsing or flushing after ultrasonic cleaning
- considering multi-stage cleaning for higher requirements
For complex parts, the goal is not only to “put the part in the tank.” The goal is to expose the dirty surfaces to the cleaning action.
If the dirty area is hidden from liquid movement, ultrasonic cleaning may not fully solve the problem by itself.
7. The Tank May Be Too Small or Underpowered for the Load
Sometimes the process is correct, but the equipment is not suitable for the workload.
A small benchtop cleaner may work for light cleaning, small parts, or occasional use. It may not work well for heavy industrial parts, large batches, deep contamination, or long production cycles.
Signs that the tank may be too small or underpowered include:
- parts fit tightly with little liquid circulation
- cleaning is acceptable for one part but poor for a full batch
- heavy parts clean unevenly
- the machine works for small parts but not larger ones
- cleaning time becomes too long for production needs
- oil and dirt quickly overload the bath
- operators need to repeat cycles many times
A larger tank is not always the only answer. The right solution may involve better loading, stronger heating, filtration, rinsing, drying, or a multi-stage system.
For industrial buyers, equipment should be selected according to part size, batch quantity, contamination type, and required throughput.
8. Frequency May Not Match the Cleaning Task
Ultrasonic frequency affects cavitation behavior.
Lower frequencies generally create stronger, more aggressive cavitation, which may help with heavy contamination on durable parts.
Higher frequencies generally create gentler, finer cavitation, which may be more suitable for delicate surfaces, small features, or precision parts.
If the frequency does not match the cleaning task, results may be poor or risk may increase.
For example:
- heavy oil, grease, or robust industrial parts may need stronger cleaning action
- delicate parts, fine details, or sensitive surfaces may need gentler cleaning
- complex geometry may require a balance between penetration and cleaning force
- some applications may require testing before choosing frequency
Frequency should not be selected by habit alone. It should be matched to the part, contamination, and cleaning result required.
9. Filtration, Rinsing, or Drying May Be Missing
Poor cleaning results are not always caused by the ultrasonic stage itself.
Sometimes the missing step happens after cleaning.
If parts are removed from dirty solution and not rinsed properly, detergent and loosened contamination may remain on the surface.
If parts are not dried quickly, water marks, oxidation, or rust may appear.
If oily contamination is repeatedly cleaned in the same bath without filtration or oil separation, oil may redeposit onto parts.
A better process may require:
- ultrasonic cleaning
- filtration or oil separation
- rinsing
- clean water rinse or final rinse
- drying
- corrosion protection for sensitive metals
For higher cleanliness requirements, a single ultrasonic tank may not be enough.
Multi-stage cleaning can separate washing, rinsing, and drying into different steps. See Multi-Stage Ultrasonic Cleaning Systems for more details.
10. How to Check Whether Cavitation Is Working
If the process variables seem correct but cleaning is still weak, the next step is to check whether cavitation is working properly.
Common cavitation checks include:
- foil test
- glass slide test
- cavitation test indicators
- checking whether cleaning action is even across the tank
- comparing results at different tank positions
A simple foil test can provide a quick reference. Suspend a piece of standard aluminum foil vertically in the filled tank and run the ultrasonic cleaner for a short test cycle. A healthy tank should create a visible pattern of small perforations or erosion marks across the foil. If the foil is mostly untouched or shows large blank areas, cavitation may be weak or uneven.
The foil test should be treated as a diagnostic reference, not a complete performance certification. Test results can vary based on foil thickness, liquid level, solution, temperature, tank size, and test position.
When testing cavitation, avoid unsafe contact with the bath during operation. Follow the machine supplier’s instructions and use appropriate protective measures for heat, chemicals, and electrical safety.
If cavitation appears weak or uneven, possible causes may include:
- incorrect liquid level
- solution not degassed
- overloaded tank
- incorrect basket or fixture
- generator or transducer problem
- aging equipment
- incorrect power setting if adjustable
If the machine is under warranty or has internal electrical components, do not open or repair it unless qualified. Contact the equipment supplier for service guidance.
11. When to Stop Troubleshooting and Upgrade Your System
If you have checked solution, bath condition, degassing, time, temperature, loading, frequency, and cavitation, but cleaning is still poor, the issue may be equipment configuration.
You may need a different setup when:
- parts are too large for the tank
- production batches are too heavy
- contamination is too oily for a static bath
- parts require rinsing and drying
- cleanliness requirements are higher than a single tank can support
- manual loading creates inconsistent results
- filtration is needed to prevent redeposition
- part geometry requires special fixtures or process testing
In these cases, simply buying a stronger cleaner may not solve the problem.
The better approach is to evaluate the full cleaning process.
This may include:
- tank size
- ultrasonic frequency
- heating capacity
- filtration
- rinsing stage
- drying stage
- basket or fixture design
- lifting or automation
- process testing
Troubleshooting Table
Problem | Possible Cause | What to Check |
|---|---|---|
Parts still oily | Wrong detergent, exhausted bath, no filtration | Chemistry, bath condition, oil load |
Dirt remains in holes | Poor orientation, trapped air, difficult geometry | Loading direction, fixture, batch size |
Cleaning is uneven | Overloading, ultrasonic shadowing, weak cavitation | Load size, part position, cavitation test |
Cleaning gets worse after fresh solution | Bath not degassed | Run degassing step before loading parts |
Cleaning takes too long | Low temperature, weak chemistry, underpowered tank | Temperature, detergent, equipment size |
White residue remains | Poor rinsing, hard water, detergent residue | Rinsing process, water quality, concentration |
Parts rust after cleaning | Slow drying, water residue, no corrosion protection | Drying method, material, post-cleaning handling |
Machine sounds normal but cleans poorly | Weak cavitation or process mismatch | Foil test, solution, loading, power setting |
Bath becomes dirty quickly | Heavy contamination, no filtration, too many parts | Pre-cleaning, filtration, bath replacement |
Delicate parts show marks | Wrong chemistry, excessive time, unsuitable frequency | Material compatibility, time, frequency |
What Information to Send Sonixmax for Diagnosis
If your ultrasonic cleaner is not cleaning properly, provide the following information before asking for equipment advice.
Information | Why It Matters |
|---|---|
Part material | Helps evaluate chemical compatibility and cleaning risk |
Part dimensions and weight | Helps judge tank size, loading, and equipment suitability |
Contamination type | Determines cleaning chemistry and process direction |
Current cleaning solution | Helps identify chemistry mismatch or residue risk |
Temperature and cleaning time | Helps evaluate process settings |
Batch quantity | Shows whether the tank is overloaded |
Photos before and after cleaning | Helps identify the failure pattern |
Dirty areas that remain | Helps distinguish surface contamination from geometry problems |
Current machine size and power | Helps judge whether equipment is under-sized |
Rinsing and drying method | Helps identify residue, staining, or rust causes |
Clear process information makes troubleshooting much faster than saying only “the machine does not clean.”
Need Help Troubleshooting an Ultrasonic Cleaning Problem?
If your parts are still oily, dirty, stained, rusty, or unevenly cleaned after ultrasonic cleaning, send Sonixmax your part details, contamination type, current process, machine size, cleaning solution, and photos.
Sonixmax can help evaluate whether the issue is related to cleaning chemistry, process settings, loading method, filtration, rinsing, drying, or equipment configuration.
The goal is not only to make the ultrasonic cleaner run. The goal is to build a cleaning process that produces stable, repeatable results.