Aug 17, 2026Ultrasonic Cleaning Solutions
Multi-Stage Ultrasonic Cleaning Systems: Cleaning, Rinsing & Drying Guide
Learn how a multi-stage ultrasonic cleaning system uses washing, rinsing, and drying to control residue for precision parts.
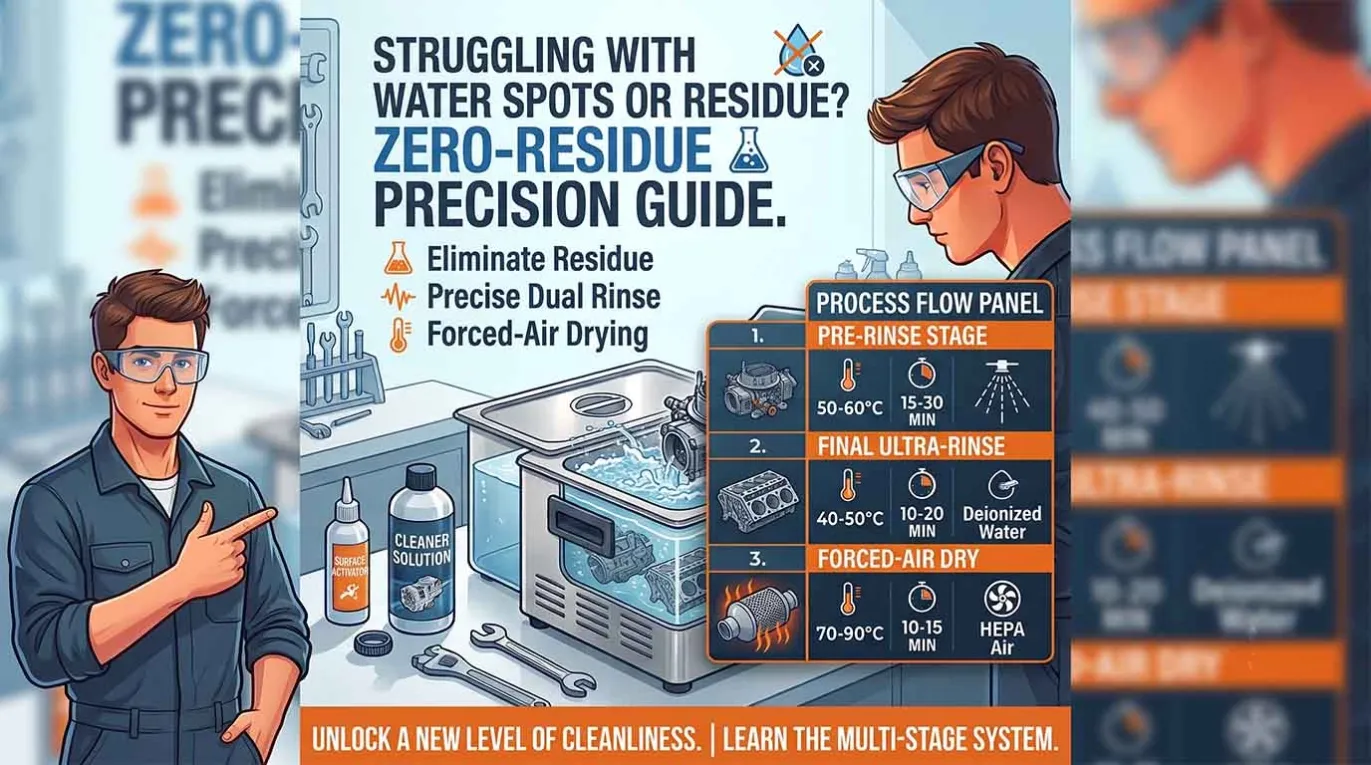
If you are rebuilding precision automotive components, fuel injectors, or preparing parts for plating and coating, removing dirt is only half the battle. The real challenge is what happens after the dirt is gone.
Many factory managers are frustrated to find that after using an ultrasonic cleaner, their parts are covered in white water spots, chemical films, or flash rust. These microscopic residues can cause subsequent plating processes to fail, or lead to rejected batches in strict quality audits.
If you are experiencing this, a single-tank ultrasonic cleaner is no longer enough. You need an industrial multi-stage ultrasonic cleaning system. In this guide, we will explain the science behind the wash-rinse-dry process and how to reduce residue through a controlled wash-rinse-dry process.
The Problem with Single-Tank Cleaners: "Drag-Out"
Why do parts come out with a chemical film? The answer is a phenomenon called "Drag-Out."
When you pull a basket of complex parts out of a single ultrasonic wash tank, the parts drag out a thin layer of the dirty cleaning solution (which contains dissolved oils and alkaline chemicals). If you let the parts air dry, the water evaporates, but the chemicals and oils are left baked onto the surface.
To solve this, you must physically remove the chemical layer through a dedicated rinsing and drying process.
The 4-Stage Ultrasonic Cleaning Process Explained
To achieve true laboratory-grade purity, industry leaders use a Quadruple-Tank System (Wash + Dual Rinse + Dry). Here is how each stage works:
Stage 1: Ultrasonic Wash with Filtration
This is where the heavy lifting happens. Using the correct frequency and the right alkaline chemistry, ultrasonic cavitation blasts away oils and machining coolants.
Always equip this tank with a 10μm filtration system and oil skimmer. It continuously removes suspended dirt and helps reduce re-deposition onto your parts. (Learn more about choosing the right chemistry in our guide: Best Ultrasonic Cleaning Solution for Engine Parts).
Stage 2 & 3: Dual Sequential Rinsing
Do you need to rinse after ultrasonic cleaning? Absolutely. But why two rinsing tanks instead of one?
When you move parts from the Wash Tank to Rinse Tank 1, some detergent is dragged along, eventually contaminating the first rinse water. By adding Rinse Tank 2, you ensure that the final water contact is with high-purity, rinse water. This two-step neutralization process is the absolute key to eliminating chemical films.
Stage 4: High-Efficiency Hot Air Drying
How to prevent water spots after ultrasonic cleaning? The secret is using pure DI (Deionized) water in your final rinse, followed immediately by forced hot air drying.
Leaving precision steel parts wet for even 10 minutes can cause "flash rust." The final stage is a dedicated hot air drying chamber (typically set between 60°C and 150°C). It forces hot air into deep blind holes and complex geometries, helping dry parts before assembly or vacuum coating.
Upgrade to the Sonixmax Multi-Tank System
Building a multi-stage cleaning line from scratch can be complicated. At Sonixmax, we have engineered the integrated multi-stage cleaning solution.
Our Industrial Quadruple-Tank Ultrasonic Cleaner (SNXM-FRD Series) integrates Ultrasonic Cleaning, Dual Rinsing, and Hot Air Drying into one seamless, heavy-duty stainless steel unit.
Available in capacities from 45L to 1500L, it features built-in 10μm filtration, adjustable 150°C drying, and dual-frequency options. It is the trusted choice for precision automotive workshops, aerospace engineers, and medical device manufacturers worldwide.