Oct 12, 2026Ultrasonic Cleaning Technology
Why Do Parts Still Look Oily After Ultrasonic Cleaning? Causes and Process Fixes
Learn why parts still look oily after ultrasonic cleaning and how to fix oily residue by checking detergent, bath oil load, floating oil, temperature, loading, filtration, rinsing, and process setup.
Parts may look clean while they are still wet, but after removal from the ultrasonic tank, the surface feels slippery, oily, or coated with a thin film.
This is a common industrial cleaning problem, especially when cleaning machined parts, engine components, maintenance hardware, cutting oil, grease, or heavy contamination.
In many cases, the ultrasonic cleaner itself is not at fault. Oily residue after ultrasonic cleaning is usually caused by a process issue: incorrect chemistry, an overloaded bath, floating oil redeposition, insufficient temperature, dense loading, missing filtration, or lack of rinsing after the wash stage.
This guide explains why parts may still look oily after ultrasonic cleaning and how to fix the process.
Quick Answer
Parts may still look oily after ultrasonic cleaning because:
- the cleaning solution is not designed for the specific oil or grease
- detergent concentration is incorrect
- the bath is overloaded with oil and contamination
- floating oil recoats parts during removal from the tank
- temperature is too low for effective degreasing
- heavy oil or sludge needs pre-cleaning first
- parts are stacked too tightly in the basket
- oil is trapped in blind holes, threads, or internal grooves
- filtration or oil separation is missing
- parts are not rinsed in clean water after washing
- a single tank is being used for a process that requires wash, rinse, and dry steps
If oily residue appears repeatedly, do not simply extend the cleaning time. Identify whether the root cause is chemistry, bath loading, oil redeposition, rinsing, or equipment configuration.
First Identify: Is It Oil, Detergent Film, or Redeposition?
Before making equipment or chemical changes, confirm what kind of residue is actually on the part.
Ask these diagnostic questions:
- Does the surface feel slippery, greasy, or sticky?
- Does the residue wipe off cleanly with a dry cloth?
- Does it appear immediately after cleaning or only after the part dries?
- Is it visible on all surfaces or only in holes, grooves, threads, and corners?
- Is there a visible floating oil layer on the surface of the bath?
- Does the residue get worse as the bath ages throughout the shift?
- Does the part look clean while submerged but oily after removal?
- Does rinsing with clean water eliminate the film?
Not every slippery film is pure oil.
It may be:
- remaining grease
- emulsified oil
- detergent film
- redeposited bath contamination
- rust inhibitor film
- cutting fluid residue
- insufficiently rinsed cleaning solution
Correct diagnosis matters. If the residue is detergent film, adding more detergent will make the problem worse. If the residue is floating oil, longer ultrasonic cleaning may simply give the oil more time to redeposit onto parts.
Suggested Troubleshooting Order
When oily residue appears, check the process in this order:
- Confirm whether the film is oil, detergent residue, or redeposition.
- Check whether the detergent matches the oil or grease type.
- Check detergent concentration and bath temperature.
- Inspect the bath for floating oil or heavy contamination.
- Reduce basket loading and improve part orientation.
- Add or improve rinsing after the wash stage.
- Consider filtration, oil separation, or a multi-stage process if the issue repeats in production.
This order helps avoid random adjustments. It also prevents a common mistake: increasing time or detergent before checking whether oil is simply returning to the part during removal.
1. The Cleaning Solution May Not Be Degreasing Properly
Ultrasonic cavitation loosens surface contamination, but the cleaning liquid must chemically break down, emulsify, or displace the oil.
If the cleaning solution does not match the oil type, the machine may run normally but still leave an oily film.
Common chemistry issues include:
- using plain water for oily or greasy industrial parts
- using a detergent that is too weak for heavy, waxy grease
- low detergent concentration
- chemical incompatibility with the part material
- relying entirely on ultrasonic power while ignoring chemical action
Different contaminants behave differently in an ultrasonic bath. Cutting oil, water-soluble coolant, engine oil, carbonized oil, polishing wax, rust inhibitor film, and heavy grease may need different cleaning approaches.
A stronger detergent is not always better. The cleaning solution must match both the contamination and the part material.
2. The Bath May Be Overloaded with Oil
Even the most effective detergent has a limit.
As parts are cleaned, oil, sludge, chips, and loosened contamination enter the liquid. Once the bath becomes overloaded, cleaning efficiency drops and contamination can redeposit back onto parts.
Signs of an oil-loaded bath include:
- visible floating oil on the surface
- dark or cloudy solution
- sticky film on parts after cleaning
- oil smell from the tank
- parts clean well in a fresh bath but worsen later
- oily residue appears on multiple batches
When the bath is saturated, extending the cycle time may not help.
The solution may need to be replaced, filtered, skimmed, or supported with oil separation. If oil load is high, the process should remove contamination from the bath, not simply keep running cycles in the same liquid.
3. Floating Oil Can Recoat Parts During Removal
This is one of the most common reasons parts still look oily after ultrasonic cleaning.
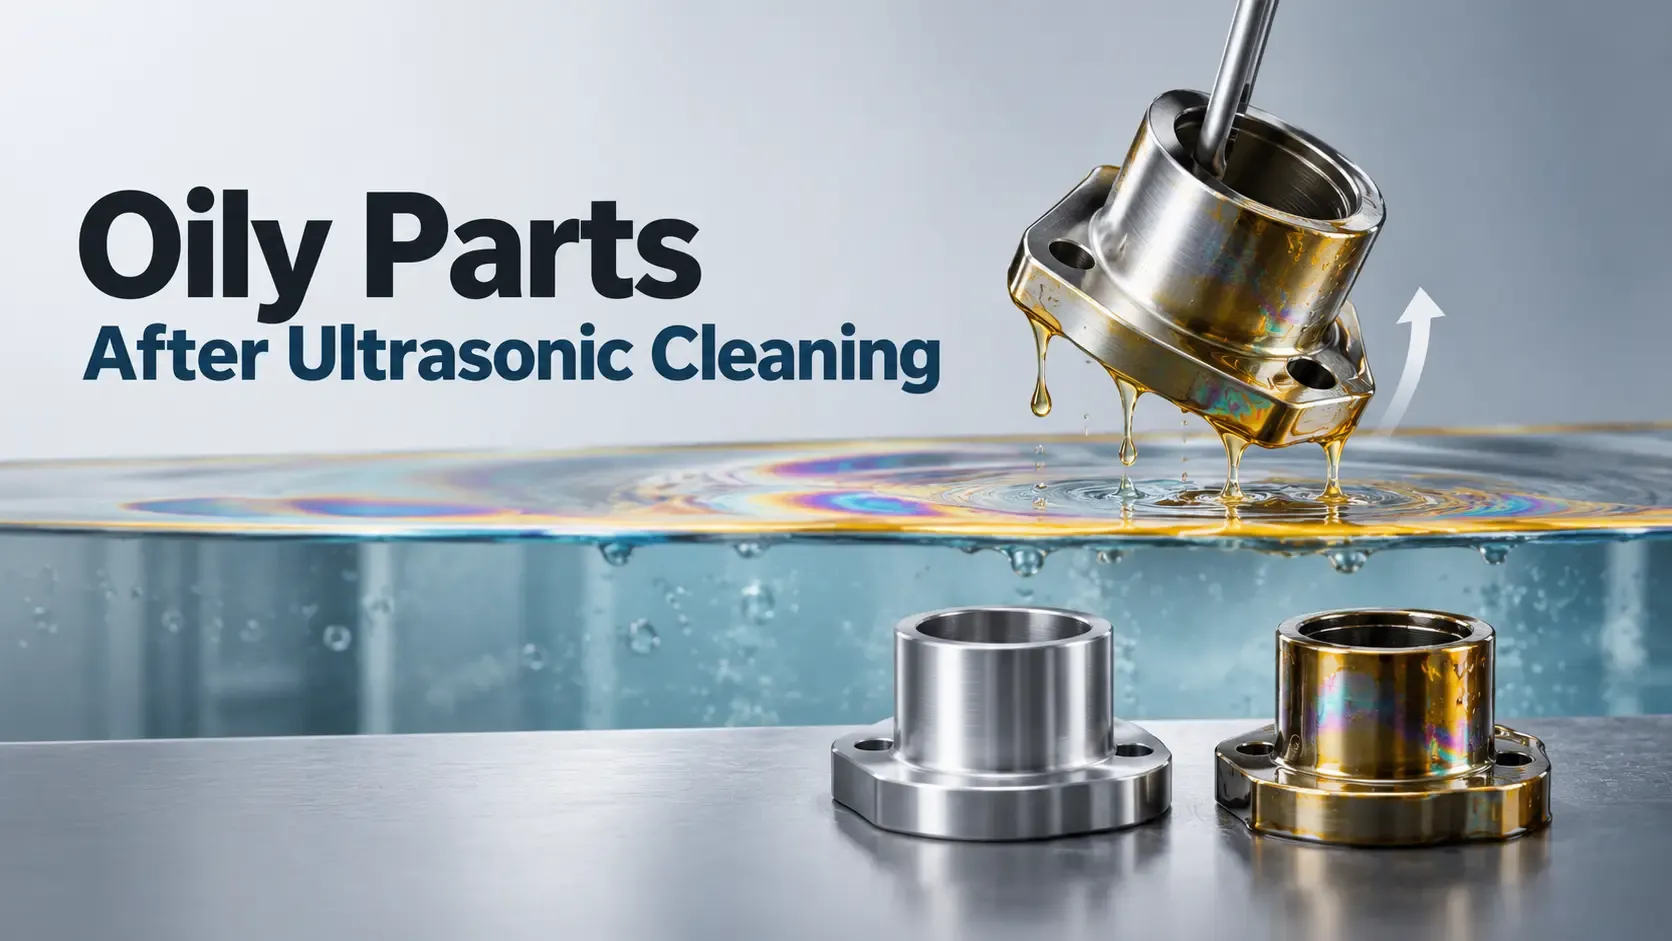
Oil often floats on top of water-based cleaning solution. Even if cavitation lifts oil off the part while it is submerged, the part may pass through the surface oil layer when it is removed from the tank.
The result is a thin oil film on the surface.
A simplified process looks like this:
Part is cleaned below the liquid surface ↓ Oil floats on the bath surface ↓ Part is lifted through the oil layer ↓ Oil film returns to the part
This makes the process look confusing:
- the ultrasonic cleaner appears to work
- the part looks cleaner inside the bath
- but after lifting the part out, oil is back on the surface
Possible improvements include:
- skimming or removing surface oil
- using filtration or oil separation
- lifting parts through a cleaner area of the bath
- using overflow design in larger systems
- transferring parts to a rinse tank after washing
- avoiding long bath use when oil load is high
If the part must pass through an oil layer every time it is removed, oily residue will be difficult to prevent.
4. Temperature May Be Too Low for Grease Removal
Temperature affects how oil and grease behave.
At low temperatures, grease may remain thick and difficult to remove. Some cleaning detergents also work better within a suitable temperature range.
If the bath is too cold, ultrasonic cavitation may loosen some contamination, but oil may remain on the surface or inside grooves.
However, excessive temperature is not always better. Too much heat can increase evaporation, affect chemistry, or create risks for sensitive materials.
The correct temperature depends on:
- part material
- oil or grease type
- cleaning detergent
- contamination thickness
- required cleanliness
- process time
- material compatibility
For engine parts, see Optimal Temperature & Time Settings for Ultrasonic Engine Parts Cleaning. For other parts, temperature should be tested with the cleaning chemistry and material.
5. Heavy Oil May Need Pre-Cleaning First
Ultrasonic cleaning is powerful, but it is not always efficient to put extremely oily parts directly into the tank.
If parts arrive covered in thick grease, heavy motor oil, sludge, or metal chips, placing them directly into the ultrasonic tank can overload the bath quickly.
Effective pre-cleaning steps may include:
- wiping or scraping heavy grease before washing
- allowing excess cutting fluid to drain
- removing loose chips
- using a rough cleaning step before ultrasonic cleaning
- separating heavily contaminated parts from cleaner batches
Pre-cleaning does not replace ultrasonic cleaning. It protects the ultrasonic bath from becoming overloaded too quickly.
For production use, this can improve bath life, reduce redeposition, and make cleaning results more stable.
6. Parts May Be Loaded Too Densely
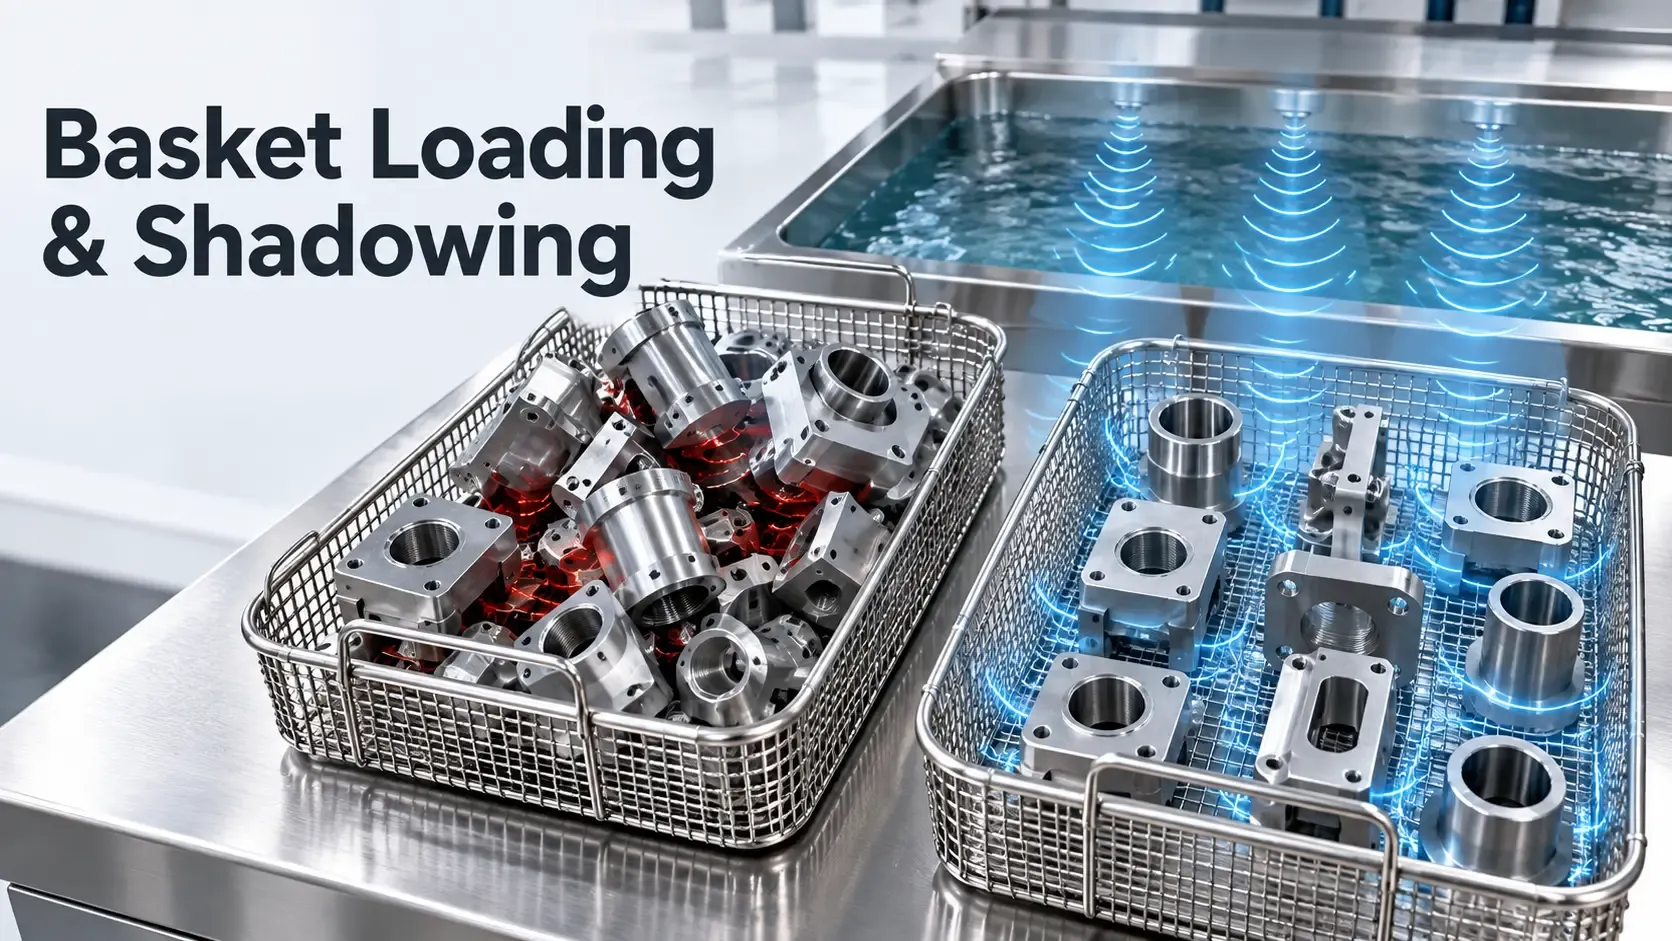
Loading density directly affects fluid circulation and ultrasonic cleaning action.
If parts are stacked too tightly, cleaning solution cannot move freely around the surfaces. Cavitation may not reach all areas evenly.
Dense loading can create:
- shadowed areas
- trapped oil between parts
- poor cleaning inside holes
- uneven cleaning across the basket
- clean outer surfaces but oily contact areas
Common loading mistakes include:
- overcrowding parts in one basket
- parts resting flat against each other
- heavy parts blocking smaller parts
- blind holes facing downward
- oil trapped in grooves or internal channels
- baskets reducing liquid flow
If fewer parts clean better than a full batch, the issue may be loading density rather than machine failure.
Better loading, improved baskets, dedicated fixtures, or batch size control may be needed.
7. Filtration or Oil Separation May Be Needed
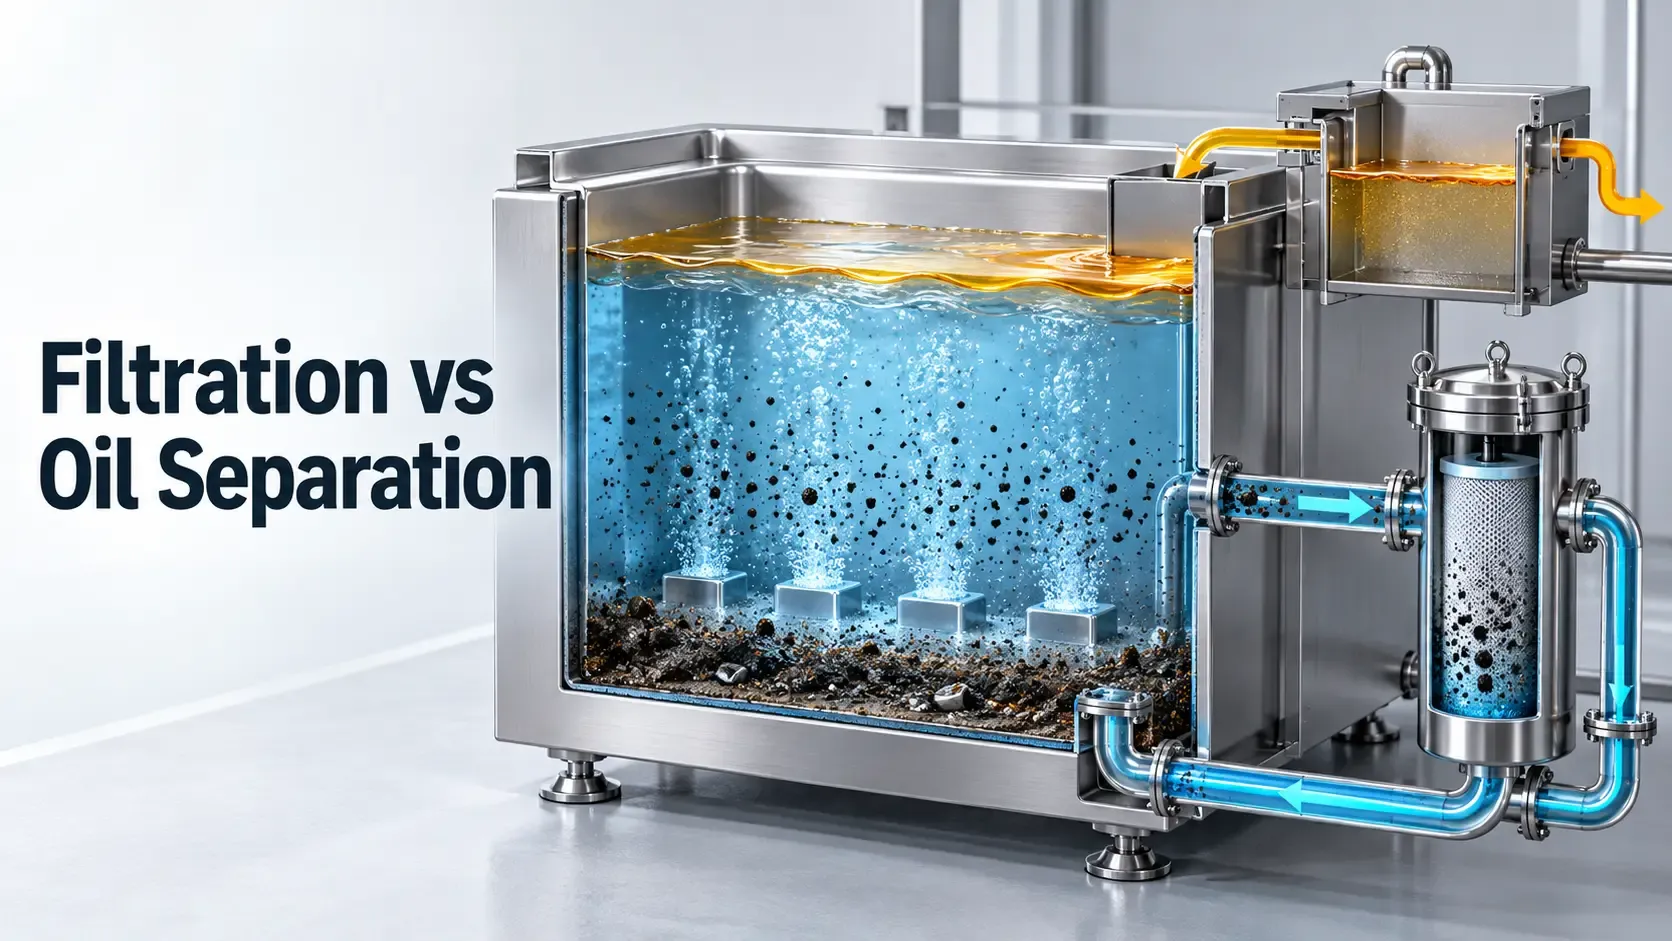
For repeated cleaning of oily parts, filtration or oil separation may be necessary.
Filtration can help remove particles, chips, sludge, and some suspended contamination. Oil separation or surface oil removal can help reduce floating oil and prevent recoating.
However, filtration is not a cure for every process problem.
It cannot fix:
- wrong detergent
- poor rinsing
- excessive oil load
- incompatible chemistry
- overloaded baskets
- a tank that is too small for production
Filtration works best when it is part of a controlled process.
For oily industrial parts, filtration and oil separation can help extend bath life and reduce redeposition, especially when the same tank is used throughout the day.
8. Rinsing May Be Missing After the Wash Stage
Even after a successful ultrasonic wash stage, parts leave the tank wet with cleaning liquid that may contain detergent, emulsified oil, and loosened contamination.
If left to dry directly, this liquid can evaporate and leave behind a thin, slippery film.
A dedicated rinse stage is important when:
- detergent concentration is high
- parts have complex geometry
- oil load is heavy
- surface finish matters
- parts go directly to assembly, coating, inspection, or packaging
- residue cannot remain on the part
A clean rinse step separates washing from final cleanliness.
For higher requirements, rinsing should not happen in the same dirty wash solution. A separate rinse tank or controlled rinse step may be needed.
9. When a Single Tank Is Not Enough
A single ultrasonic tank may be enough for simple cleaning, light contamination, or occasional use.
But if oily residue appears repeatedly in production, the process may need more than one step.
A more controlled process may look like this:
Pre-cleaning ↓ Ultrasonic washing ↓ Filtration or oil separation ↓ Rinsing ↓ Drying
In some cases, a multi-stage system may be more reliable than repeatedly extending the wash cycle.
You may need a more complete process when:
- parts are heavily oily
- bath contamination builds quickly
- parts must be clean before assembly
- oily residue returns after removal
- rinse quality matters
- drying consistency matters
- operators need repeatable results
Troubleshooting Guide
Symptom | Primary Cause | Recommended Action |
|---|---|---|
Parts feel oily immediately after removal | Floating oil recoating parts during lift-out | Remove surface oil, add oil separation, or transfer to rinse stage |
Parts clean well in fresh bath but fail later | Bath overloaded with oil and contaminants | Replace solution, add filtration, or pre-clean parts |
Oily or slippery film wipes off easily | Unrinsed detergent or emulsified residue | Add a clean water rinse stage after washing |
Oil remains inside blind holes or threads | Trapped oil or poor loading orientation | Reorient parts, flush holes, or reduce batch density |
Cleaning cycle takes too long | Low temperature or weak chemistry match | Verify bath temperature and match detergent to contamination |
Outer surfaces clean but contact areas oily | Dense basket loading or shadowed areas | Reduce batch size or use dedicated fixtures |
Oil layer visible on tank surface | High oil load | Skim oil, use overflow, filtration, or oil separation |
Same process works on light oil but not heavy grease | Contamination is too heavy for direct washing | Add pre-cleaning or adjust chemistry and process time |
Summary Checklist to Prevent Oily Residue
To maintain oil-free parts, control these core process variables:
- Chemistry: select a detergent formulated for your oil type and part material.
- Concentration and temperature: maintain the correct mix ratio and heating range.
- Pre-cleaning: remove bulk grease before ultrasonic immersion when needed.
- Surface oil control: remove floating oil before pulling parts out.
- Loading: avoid dense stacking and trapped oil zones.
- Rinsing: rinse in clean water to remove surfactant and emulsified film.
- Bath management: monitor bath life and replace or filter solution regularly.
- Drying: dry parts properly after rinsing to avoid secondary residue.
Oily residue is usually not solved by ultrasonic power alone. The full cleaning process must remove oil from both the part and the bath.
Diagnosing Process Issues with Sonixmax
If your parts still feel oily, slippery, or coated after ultrasonic cleaning, send Sonixmax your application details:
- part material and geometry
- oil or grease type and thickness
- current cleaning detergent and mixing ratio
- bath temperature, cycle time, and batch size
- bath condition and visible floating oil
- rinsing and drying method
- photos of parts before and after cleaning
Sonixmax can help evaluate whether your application requires chemistry adjustments, parameter tuning, filtration, oil separation, rinsing, drying, or a multi-stage equipment workflow.
The goal is not only to remove visible oil. The goal is to build a stable cleaning process that prevents oil from returning to the part.